When to Plant Potatoes in Utah? - Wilson Garden
Utah's Climate
Generally, potatoes thrive in cool temperatures. In Utah, this means planting can occur as early as two to four weeks before the last expected frost date.
In the northern regions and higher elevations, this typically translates to late March or early April. Conversely, in the southern areas, you may need to wait until mid to late April. This avoids frost damaging the young plants.
When to Plant Potatoes in Utah?
Early Spring Planting (March-April)
The best time to plant potatoes in Utah is from March to April. You plants will establish before the full force of summer heat. However, consider frost and ensure the soil is workable and not too wet.
Russet Burbank: This classic potato variety is versatility and storage longevity. It is a great early-season choice.
Yukon Gold: It has an early maturity and creamy texture. Yukon Gold is perfect for those eager to enjoy their harvest sooner.
Mid-Spring Planting (April-May)
For those who miss the early spring window, mid-spring offers another excellent opportunity for planting. This period is characterized by more stable temperatures and fewer risks of a frost event.
Red Pontiac: Known for its disease resistance and good storage, Red Pontiac is ideal for planting in this window.
Kennebec: Offering versatility and a robust yield, Kennebec is another excellent choice for mid-spring planting.
Late Spring Planting (May-June)
Late spring planting is the final opportunity to plant potatoes in Utah. This period requires careful consideration of the upcoming summer heat. You should choose the best potatoes to grow in Utah.
Purple Majesty: It has a unique color and strong flavor. Purple Majesty can tolerate the warm onset of early summer.
Adirondack Blue: This variety offers a striking blue color and resistance to some of the heat challenges of late planting.

How to Grow Potatoes in Utah?
Preparing the Soil
Tilling the soil 8-12 inches deep. Incorporating generous amounts of organic matter. For example, compost or well-rotted manure. These steps help to improve drainage, and increase fertility.
Proper drainage is crucial. Waterlogging can lead to rot and other diseases. Additionally, potatoes prefer slightly acidic soil. Make sure the pH level is 5.8-6.5. I recommended conducting a soil test before planting. Testing your soil pH and adjusting it accordingly.
Choosing Seed Potatoes
You should select certified disease-free seed potatoes. They can ensure a healthy and productive crop. The seed potatoes should be well-suited to Utah's climate and soil conditions. There are numerous sources for seed potatoes in Utah. For example, local nurseries, garden centers, and reputable online suppliers.
How to Plant Potatoes in Utah?
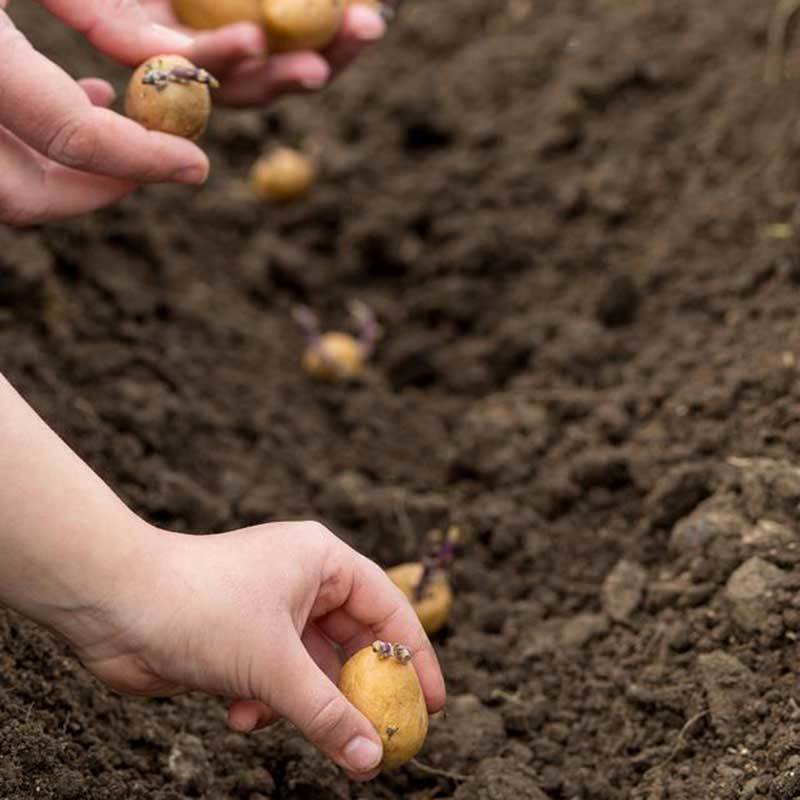
The ideal planting window is in early spring. Dig trenches about 3-4 inches deep when growing potatoes in Utah. Placing the seed potatoes about 12 inches apart with the eyes facing upward. Cover them with soil and water well. Space about 36 inches apart in rows. This allows for easy cultivation and growth.
As your potatoes grow, mound the soil around the plants. This protects the tubers from sunlight. That can cause them to turn green and become toxic. You need regular watering, especially during the dry summer months.
Caring for Potatoes
Watering
You should implement a drip irrigation system or a soaker hose. They can provide steady and efficient watering. Mulching around your plants will also retain soil moisture and regulate temperature.
Fertilizing
Potatoes are hearty eaters. They require more nitrogen in the early stages for leaf development. Then, phosphorus and potassium as tubers begin to form.
Start with a soil test and supplement as needed. Organic options are great for enriching the soil. For example, compost and fish emulsion. Synthetic fertilizers can also be effective. But use them judiciously to avoid overfeeding.
Pest and Disease Management
Colorado potato beetles, aphids, and blight are common culprits. Early identification is key to management. Regularly inspect your plants for signs of distress. For example, chewed leaves or discoloration.
Neem oil and beneficial insects can help control pest populations. In more severe cases, conventional pesticides may be necessary. Always follow label instructions to protect your plants and the environment.
Harvesting and Storing Potatoes
When to Harvest Potatoes in Utah?
Firstly, look for the potato plants to flower. This is a sign that tubers are beginning to form underground. However, the key indicator is when the foliage starts to yellow and die back. This die-off suggests that the potatoes have stopped growing and are entering the final maturation phase.
Harvesting Techniques
Begin by using a garden fork or a specialized potato digging tool. Gently lift the soil and retrieve the tubers. Careful handling to avoid bruising or cutting the potatoes. Any damage can significantly reduce their shelf life.
Once harvested, cure your potatoes before storage. Letting them sit in a dry, well-ventilated area for about two weeks. Make sure the place is without direct sunlight. Curing allows the skin to harden. Then, store your potatoes in a cool, dark place with good air circulation. Avoid washing the potatoes before storage. Moisture can promote decay.

